Tuesday, December 29, 2009

Ginger Peach Jam Test Batch

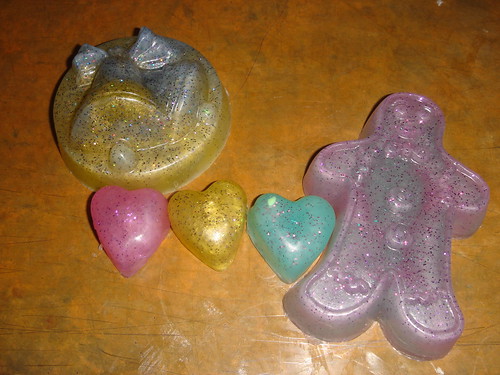
While testing another fragrance in cold process, I didn't expect to encounter such a great chemistry experiment! I used titanium dioxide to whiten the yellow hue of the natural soap (which is caused mostly by the palm oil) and colored the other half of the swirl with cellini blue mica. I was expecting this color:... not pink and then purple! Immediately, the raw soap turned a bright pink and by the end of the day, the color deepened into a beautiful purple. When I put my used Pyrex in the sink for a rinse after I finished pouring, the pink soap leftover in the dish turned bright blue as soon as the water hit it. This is a great reminder to always do a small test batch when using a new color or fragrance for the first time before making large quantities, particularly if you intend to sell your soap. I'm curious to see if this batch will go back to blue by the end of the month-long waiting period. Either way, it smells great and will make a wonderful addition to our bulk loaf soaps for sale in the store!

Thursday, December 24, 2009

Cow Soap?

Behold, the cow soap! Created by one of our enthusiastic cold process class participants on December 19th, she used black oxide and titanium dioxide to get that great contrasting swirl pattern. Simply alternate pouring the black and white and then don't touch! No swirling with the spoon-- you'll get gray. Turned out pretty cool!

We also had fun with additives such as ground green loofah and lavender buds. Remember, those buds will eventually brown over time, as will any dried plant that naturally decays. The loofah looks great and will be an awesome exfoliant.


Our next class is on Saturday, January 16th. Sign up here or give us a call at (360) 676-1030 to grab your spot! Happy Holidays everyone!

Monday, December 21, 2009

Tentative Otion Soap Weekend Intensive


We are so excited to have our Otion Soap Weekend Intensive class happening for the third year in a row. Packed with information and expert teachers, this is a small, hands on class with practical advice to provide you an excellent base of knowledge for Soapmaking and lotionmaking as well as the inspiration to take your crafting to the next level. LOOK for sign up in early January.

Tentative weekend plans

Friday 3 p.m. Beginning Melt & Pour (optional if you need schooling the basics)

End 5 p.m.

Saturday 9 a.m. Welcome/Get Acquainted time

9:30 Beginning Cold Process

11:30 Lunch/Break

12:30 Advanced Cold Process – swirling, layering

2:30 break

3:00 Liquid Soapmaking

5:30 End

Saturday 9 a.m. Melt and Pour Advanced

10:30 break

10:45 Melt and Pour Advanced

12:30 Lunch

1:30 Lotionmaking 101

3:30 Graduation, wrapping, cupcake celebration

Wednesday, December 16, 2009

Santa's Soap Shop

We've been wrapping up gift soaps like elves here at Otion and are very happy to see an abundance of eager craftspeople come in to pick up supplies for their handmade presents this holiday season. Many customers are first time soapers interested in a fun, easy soap-making method that can be done with the kids. Of course, melt-and-pour is the way to go, and soap makes the perfect gift for the kids' teachers! Others are picking up melt-and-pour lip balm and perfume base for a quick stocking stuffer project.

Here, we are putting together a special order of colorful, wrapped melt-and-pour soaps for a long-time customer. We like using clear plastic wrap as packaging so you can still see and smell the soap. Simply wrap the soap with the open end of the plastic gathered on the back, cut off the excess plastic wrap and flatten it on the back of the soap. Here's the fun instant gratification part; use a heat gun to shrink the plastic wrap to form fit to the soap. Be careful not to apply too much heat or you may stretch the plastic too thin and create a hole, or even melt the soap a bit! Then, tie a ribbon with a card for the final touch. Every extra effort is appreciated!

Please let us know how we can help you get through your Christmas crafts smoothly this year. Questions and ideas are always welcome! Happy Holidays everyone!

Saturday, December 5, 2009

Pomegranate Mango Test Batch

Another delicious fragrance to test, another fun opportunity to play with color and swirling techniques. Here, I used a combination of brick red oxide and cellini red lip safe mica for the bulk of the soap, and yellow lip safe mica for that added pop of color.


I love the fireball look to the swirl pattern!


Wednesday, December 2, 2009

*New at Otion* We Have Soapylove!

Delectable Desserts

Set includes 20 ml each of: Chocolate Fudge, Strawberry Jam, Vanilla Frosting, Orange Sherbet, and Vanilla Stabilizer.

Chocolate Fudge: Deep rich choclatey scent with warm, milky notes.
Strawberry Jam: Just like mom's homemade preserves. It's a plump summer strawberry with sweet sugary notes for the perfect jammy blend.
Vanilla Frosting: A creamy confectionary blend, this vanilla scent has just a hint of cream cheese for a delectable and sugary aroma.
Orange Sherbet: Bright and sweet orange with dulcet vanilla ice cream makes this blend just like an icy creamsicle bar.
Vanilla Stabilizer: Use this additive in equal parts to prevent discoloration from all the sweet, vanilla notes present in these fragrances.


Sweet Treats

This kit contains: 20 ml each of Bakery Beige, White Icing, Pink Frosting, Buttercream Yellow, and Rainbow Sprinkles.


Jewelry Box

Kit contains: 20ml of Ruby Red, Fiery Fuchsia, Turquoise Blue, Sunshine Yellow, Sparkle Dust (superfine iridescent glitter)


Candy Jar

Set includes 20 ml each of : Cherry Pop, Pink Strawberry, Lemon Drop, Tutti Fruity, & Vanilla Stabilizer.

Cherry Pop: Fizzy Cherry soda pop scent has just the right balance of effervesce to sugary cherry syrup.
Pink Strawberry: Hard candy sweetness with perfectly authentic artificial Strawberry notes - just like the little candies your grandma told you'd break your teeth on!
Lemon Drop: Zingy lemony candy scent that reminds us of the old-fashioned lemonheads candies.
Vanilla Stabilizer: Use this when you don't want your soap to discolor due to the sweet vanilla notes. Use in equal parts to fragrance oil before blending into soap.
Tutti Fruity: This fruit cocktail type fragrance has notes of pineapple, peach and maraschino cherries all packed into the delicious sugary syrup.

Saturday, November 28, 2009

Shout-Out to Rocket Donuts!

Here at Otion, we have the (guilty) pleasure of working directly across from Rocket Donuts in downtown Bellingham. I can see the donuts from our window. Heck, we can practically smell the delicious goodness, or is that just our new Clementine Cupcake fragrance? Anyway, let me just say, you guys rock! Right now, I'm lovin' your pumpkin spice cake donut topped with homemade cream cheese. It's a little Christmas present for my mouth and most definitely deserves honorable mention of donut of the month.


Plus, the coffee's always great, as is the awesome service. If you're not feeling the donuts (haha, that's a funny thought), there are also fresh baked muffins (my favorite is the vegan blueberry raspberry muffin-- there are many vegan options all over the menu), quiche, and breakfast wraps.

Here's an idea! Come visit us at the store, make some holiday soap for Christmas presents and stocking stuffers at the Soap Bar, walk across the street to Rocket and reward yourself for the fabulous soap you just made. When you return, your soapy creations will be hardened and out of the mold ready to take home!

Monday, November 23, 2009

November Cold Process Class

Cheers to another new group of cold process soap makers! Check out these incredible bars made in Saturday's class.

I didn't have to ask twice for volunteers to portion oils or even to make the lye solution-- everyone was eager to learn, full of great questions, and stepped right up to participate. Many had already played with melt-and-pour soap making and were ready to start from scratch.


We went over everything from additives, color, properties of oils, fragrance vs. essential oils, supplies, molds, safety with sodium hydroxide, what soap is and how it works, swirling and layering techniques, you name it.


Congrats on your new skill and let the experimenting and creativity begin!

Thursday, November 19, 2009

Something Different


Felted wish stones are a unique gift that will have people asking, "How did you do that?" Not to mention, it's an interesting project that can be made using a few simple household items and some sheep's wool. We're going to make a very enigmatic looking object, and you'll either love it or find it a little too weird. So, let's get started!

Grab a small stone from the yard, preferably about the size of your hand with a fairly smooth surface. Next, you need two medium sized pots or bowls for water-- one for hot and one for cold, some liquid dish soap, rubber gloves, an old nylon stocking and some scissors, and finally wool for felting which you can buy in various colors at your local yarn or craft store. Now, be prepared for some serious scrubbing action; this project is a mini workout, too!

The first step is to cut the foot off your stocking, so make sure you don't want it anymore. We will use this to hold the felt onto the stone during the felting process. Prepare your space in the kitchen by filling up one of your pots with very cold water and one with very hot water. You can boil the water on the stove first if you prefer. Always take proper safety precautions when using high temperatures.


Next, pull off several thin layers of wool and begin layering them on your stone until all of the stone's surface area is well hidden beneath at least an inch or two of wool. Each layer should go in opposite directions-- think of placing each layer in an "X" pattern. It will look like a giant hair ball at this point, but trust me, the wool will condense during the felting process. Here's the tricky part, put your hair ball rock into the foot of the stocking and tie it tight with a slip not that can easily be untied again. We'll be retying it as we go to keep pulling the stocking tight against the stone, which helps the fibers form together. The tricky part is making sure the stone continues to stay covered with wool on all sides while being shoved into a tiny stocking.


Now, put on your rubber gloves because your hands will be going back and forth between very hot and very cold water, and you don't want to feel it. Let the felting begin! Dip the stone into hot water and squirt a generous amount of liquid dish soap all over it (the slip will keep the scrubbing process from being too abrasive). Now, rub the stone like crazy. Then dip it into the cold water and repeat. Go back and forth between hot and cold, adding soap, scrubbing hard and you will shock the the wool fibers, felting them together. As you continue this process for at least 10 to fifteen minutes, untie the stocking and move the stone around in it, and retie it nice and tight. If you keep scrubbing the same places over and over without rotating your stone, you may get a little wool that finds its way up into the knot of the stocking and that ends up looking like a little tail. You can easily just cut this part off if it happens.


To add the band of color, thus making it a wish stone (I've also heard the band symbolizes good luck), pull back the stocking halfway through the scrubbing process and wrap a thin band of wool in a different color all around the stone, retie the stocking and continue felting. The more scrubbing the better! You will know you are done when the fibers are flat against the stone and there are no floofs of wool unattached. Squeeze the stone to get out excess water and sit it on the counter to dry. There you have it! You can even do this with soap as a natural exfoliate. The heft of the stone makes an interesting contrast with the lightness of the wool. If you want to have a little fun, have someone close their eyes and feel it before they know what it is, you'll get a great reaction! Enjoy using this new skill to felt just about anything.

Monday, November 16, 2009

Fun at the Soap Bar


We had a super busy Saturday at Otion with multiple soap bars. We love having people just walk into the store and saunter up to the bar to make soap on the fly. It's total instant gratification as crafters get to take their soap home in just 20 minutes after their soap is made. It's just barely enough time to head next door to Rocket Donuts and grab a donut.

Georgia and Kaya came in this weekend and made GREAT soap. They are 7 and 8 years old and really got into choosing the perfect colors and molds. You can tell that glitter was a big factor in their color choices.

It's super easy to make soap. You can come in and learn on the fly at the Soap Bar or take one of our classes for a more detailed, in depth technique and project class. We're going to do some stocking stuffer classes so stay tuned for dates and information.

Thursday, November 5, 2009

Upcoming Classes

Our cold process class for November 21st is officially full, but feel free to sign up for the next session on Saturday, December 19th. Classes start at 3 p.m. and cost $30. For more information, click here. We are also in the process of scheduling lotion classes again, so keep an eye out for further updates.

Wednesday, November 4, 2009

'Tis the Season!


Are you ready for the holidays? It might be hard to believe, but it's that time already. Candles, lip balm, gingerbread men and holiday stamp soaps make the perfect stocking stuffer. It's easy to customize gifts for your friends and family by using their favorite scents and colors, or simply use our Christmas Cheer Fragrance Kit to cover all the must-have holiday aromas.

Handmade soy candles are easy to make gifts and create the perfect ambiance for holiday gatherings (check out the candle page at Bramble Berry for all the basics). Plus, our candle tins are great for quick packaging-- just slap your personalized sticker on the top and you're done!

We'll help you keep the stress out of your seasonal soaping, just click here for a full list of winter holiday molds, colors and fragrances-- you'll be sure to get some fun ideas. You can also follow Anne-Marie on Soap Queen T.V. for step-by-step project tutorials so you can get it done right the first time. Happy holidays!

Thursday, October 29, 2009

Simple and Beautiful

When I think of flowers, I think of color. But why not try something a little different? All you need for this basic melt-and-pour project is a clear soap base, shredded loofah, our flexible orchid mold, and fragrance of your choosing. I went with Ginger Blossom just to confuse everyone, cause you know, I could just use our Orchid fragrance ;-)


Start by melting the chopped base as usual (45 seconds in the microwave) and mix in about half a dropper or 2-2.5 milliliters of fragrance and about 1/4 tsp of shredded loofah per melted mug of soap. I used a green loofah-- we no longer carry colored loofah at Bramble Berry, but if you stop by Otion you can pick up violet or green while it's still here. The amount of loofah is really up to you--go with the "less is more" mentality, or throw a bunch in there for extra exfoliating action. I went with a pretty happy medium so that there's enough space between the loofah particles to make them stand out from one another.


The key to getting your loofah to suspend in the soap instead of sink to the bottom is to keep mixing until the soap is fairly cool and slightly thick but not clumpy. You know, it's the phase right before you end up frustrated because you have to re-melt it (usually followed by a "Grr!" or some form of bad word). Pour into the mold, spray with rubbing alcohol and pop it in the freezer for a few minutes to let it set up quickly.


De-mold, which is really easy with the flexible material, and there you go! Quick, easy, effective and very beautiful.

Here's another idea-- add some liquid blue to your clear base and shredded loofah to make a unique snowflake soap for this coming winter season!


Thursday, October 22, 2009

Working Hard or Hardly Working?

I'll admit it, this job is way too fun to consider work! One of my favorite things to do here at Otion is test fragrances in cold process soap. It's a great opportunity to practice swirling techniques and try different color combinations, not to mention the thrill of using a totally new scent. Here, I used antique blue mica, yellow mica, and coral mica to create this fiery swirl for a Chipotle fragrance. Can't wait to see how the pattern changes with each bar!

Saturday, October 17, 2009

October 17th Cold Process Class


What a stormy night! Talk about great weather to be inside making soap, not to mention perfect sound effects behind the instruction. It was pretty funny to be saying something like, "... and now we have reached trace!" and have it followed up with thunder and lightening. Made for a very dramatic presentation. I think we all had a lot of fun and the swirls keep getting better and better! There were a lot of very sharp, clean looking swirl patterns as a result of using more of one color than the other in the bar. Maybe it's just me, but the contrast seems to make more of an impact.

A special thanks to those who made the trip from out of town. We had a couple people that came up from Tacoma and one from Los Angeles. Now those are dedicated soapers!

Again, I am super impressed by the beautiful bars that were made in class and can't wait to see what next month's students produce.

Wednesday, October 14, 2009

Mmm... Black Cherry

This new fragrance is bursting with juicy, lip-puckering goodness! When you try a black cherry fruit and compare it to the common sweet cherry, you will notice that the Black Cherry has a sharper taste and is a bit more complex. This fragrance is incredibly long lasting and strong in cold process soap, retaining all the sweetness of Cherry while adding rum notes and deep red tartness. We love combining it with Champagne for a bubbly, soda pop scent.

And hey, there's even a Black Cherry Low Ph LabColor for the perfect tint!

Monday, October 12, 2009

Trick-or-Treat!


Wonderful, relaxing soap. Luxurious, soothing, fragrant indulgences that have the ability to lift and calm our spirit after a hard day's work.

Well, this month, we're doing a different kind of spirit lifting! We're breaking out the pirates and the skulls! Put aside those foo-foo floral soaps with rose petals. Argh! Halloween is quickly approaching and Otion is filling with some creepy creations.

How about handing out glycerin ghouls or sudsy skeletons this year? Trick-or-Treat, or both!

Wednesday, October 7, 2009

A New Addition to Our Fragrance Line

What? A fragrance that both women and men enjoy? That's right! We are thrilled to introduce a favorite scent among the staff here at Otion-- Vanilla Oak.

Over a year ago, a customer sent us a partially burned candle from an obscure vendor. We loved it so much that we spent the better part of a year trying to perfect this mystical blend. With notes of Light Camphor, Italian Bergamot, Cassia Root to provide flighty top notes, this fragrance really shines with the strong middle and base notes of Sweet Heliotrope, Soft Amber, Warm Oak, Sandalwood, Patchouli and Creamy Vanilla. It's a lot to fit in one small fragrance but we think you'll be enchanted. Discolors to brown in toiletries because of the Vanilla but smells so good you won't even care.


Wednesday, September 30, 2009

Another Fun Class!

Check out these vibrant bars made in the September 26 cold process class at Otion! These were their favorites from the 16 or so that were made. I love the playful colors and swirls! Participants that were new to soap-making found that cold process wasn't as intimidating as some books made it seem. Some even got over their sodium hydroxide anxieties!

It's a great idea to read up on cold process soap-making before you give it a try so you know what is involved. For an added confidence booster, take a hands-on instructional class with a group of people-- some of the questions that come up from other students will definitely add to the learning experience. I don't know about you, but I'm a big time visual learner and by seeing things done by example, it takes some of the pressure off of trying it myself for the first time. Looking forward to our next class on October 17th. Sign up online or visit us at the store!

Wednesday, September 23, 2009

Geometric Layered Soap

Ah, the wonderful world of melt-and-pour soap making! For those of you who thrive on instant gratification, there's no better outlet for your creativity than customizing your own soap. Here's a little project that you really can't mess up. Start with a pre-made soap base, melt it in the microwave, add color and fragrance and pour a thin layer into our flexible brownie pan tray. Let that layer harden, remove it from the mold (this is where the flexible mold is most helpful), and repeat with any color or combination of colors you desire. Keep in mind that your fragrance should be consistent with each layer because they will be mixed together in the embedding process.

After you've made a few different hardened layers, cut them up in squares and rectangles. Melt down some more soap and leave it clear or lightly tinted so you can see the layers. This freshly melted soap is going to work as the glue to hold your chopped pieces together. Fragrance is optional. Using the same tray mold, pour a thin layer of fresh soap and spray with rubbing alcohol. Don't forget to generously spray the cut pieces with rubbing alcohol, too, before embedding them into the melted soap. Now, place your squares and rectangles into the wet layer, and alternate between pouring melted soap and embedding the cut pieces.

Keep adding until you fill the mold, spray the top one last time to get rid of those pesky bubbles, and let it harden. Release the soap from the mold and cut into bars with a kitchen knife, cutter/scraper, or crinkle cutter. There you go! A beautiful, vibrant and original work of art, er... soap. Give it a try!

Monday, September 21, 2009

New Fragrance at Otion!

Yes it's true, summer is coming to an end, but some of us don't want to admit that!
Summer Melon Spritzer is sure to make your mouth water. Cantaloupes, Watermelons and Canary Melons come together in this fragrance for a sweet, summery delight. Supporting top notes of Japanese Grapefruit, Crisp Apple and Pomelo bring a bright and cheery melding to the bottom note of Tonka Bean. The secret ingredient to this fragrance is Tonic Water (thus the 'spritzer'). It works beautifully in CP soap, stays a creamy tan and is ideal in all manner of other toiletries.
I love using coral mica and yellow oxide pigment to make a vibrant cold process batch!

Monday, September 14, 2009

Soapy Success

Our private cold process class last week was a blast! I was super impressed by the advanced swirling techniques that everyone jumped right into and ended up with some gorgeous bars to take home. Check out these swirls!