Wednesday, March 31, 2010

New Heavy Duty Tractor Mold


Check out our newest mold design, the tractor! We love the endless color combination possibilities, the separate sections for layering little details, and the perfect 4 oz bar size. Pair it with Grass Stain fragrance oil and throw together a few melt-and-pour Cartoon Cows for a great farm themed Spring soap line.

Monday, March 29, 2010

Swirling Exercise

Saturday was a blast! We had Kim from Pepo Park take some private classes with us before the full liquid soap session at 2pm. She was very energetic and prepared with awesome questions. Being an experienced soap maker for 10 years, we went right into some advanced swirling techniques.

In this cold process batch, we used a blend of Orange Valencia and Lemongrass essential oil. About half of the base was lightened up with a little titanium dioxide, which created the perfect cream color to go with the deep cappuccino mica and yellow oxide swirl. I'm glad we didn't fragrance it with Chipotle Caramel or I would have taken a bite right into it! We used a rubber spatula and reeds to make the swirl pattern and it hardened up enough by the end of the day for her to take it home. Thanks Kim, you did a great job!

For a list of our classes and opportunities for you to create your own day or class with one of our instructor's including Otion and Bramble Berry founder, Anne-Marie from Soap-Queen, please check out this page on our website.

Thursday, March 25, 2010

Soap for the Gardener

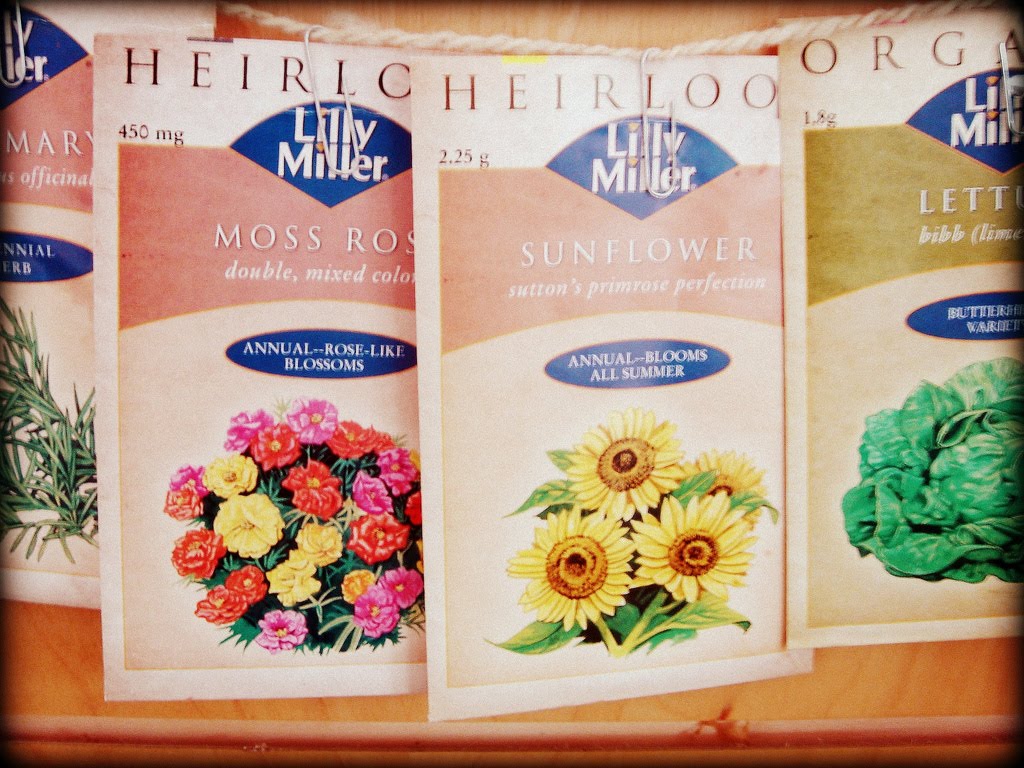
For some, Spring means more than just longer days. It means getting your hands dirty in the garden! This gave me the idea of putting seeds in a clear melt-and-pour soap base and pairing it with a fun garden inspired fragrance or essential oil, such as tomato leaf, lettuce, rosemary, or gardenia to name a few.

If you want to make a cute gift set out of it, use the seed package to create a unique and colorful card. Simply cut out the front side and glue it to the face of a sturdy blank card (cardboard works perfect for this). If you want to take it further, throw in a fragrance, some reeds and your beautiful custom soap in a large jute bag for an added "earthy" feel.

I really like using a clear soap base because it lets the light shine through, exposing the seeds. I also tried swirling in some opaque soap to achieve a creamy appearance. See below.

I'm definitely going to keep an eye on the soaps over the next week to see if the seeds cause unsightly brown spots that is so common with dried botanicals, such as lavender and rose buds. Even so, if you're giving this soap to a gardener, a little natural browning probably won't be too upsetting for them ;-)

Friday, March 19, 2010

The Great Rebatch Experiment

I'm definitely a sucker for a good deal, and as soon I found an old Crock Pot at Value Village for $10, I new I had to try a rebatch! I started out by grating down a cold process loaf that I thought was pretty boring looking and threw it in the pot with a few splashes of water, cranked it to high (since my old pot only had two settings), stirred it and went back to business around the store.

I must admit, I wasn't very particular about keeping track of exact times, quantities and temperatures. Instead, I pretty much treated it like a carefree concoction and threw a bunch of stuff I had at hand into a pot, checked on it once in a while to stir and add more water over the course of an hour or more. When it came to a translucent phase (as in photo below), I added color and fragrance and some dried chamomile (roughly an ounce of fragrance for this two pound batch, and a couple of teaspoons of mica pigment).

Then I gooped it into my lined mold and sprinkled some lavender buds and more chamomile on the top for a little detail and let it sit overnight.


When I cut it the next day, I was a little underwhelmed by the fragrance. Apparently I'm not a huge fan of the smell of dried chamomile and didn't put enough fragrance oil in to mask it, but I'll keep that in mind for my next batch. It was also pretty soft because I added a little more water than necessary, but it will sit out and cure over the next few days and harden up. Still, I took advantage of the softness and rolled some fun looking balled bars.


The texture of rebatch soap is awesome-- very handmade and rough looking. When making soap from scratch, you need to wait a full month for the lye to neutralize before you can use your soap. The beauty of rebatching is that you are simply changing an existing finished soap so there is virtually no wait time. Either grate down a cold process loaf like I did here, or you can purchase some pre-grated rebatch bases like these. I can't wait to try it again!

Wednesday, March 17, 2010

Soap Bar Wedding Favors

Yesterday, we had the pleasure of helping out a first-time soap-maker with wedding favor soaps for her sister. We discussed color, theme, scent and quantity and used the soap bar to make a practice batch before she does the rest of her project in Texas. She used the guest botanicals mold, countryside blue dust labcolor and shea melt-and-pour soap base to practice layering. She also tried out swirling with a discontinued leaf mold that we have floating around in the soap bar bins. Bravo!


Here are some tips for making wedding favor soap:

1. Use the colors from the wedding to keep the theme consistent.
2. If the couple is known for something, try to pick a mold that expresses their personalities. Classic and elegant, or humorous and adventurous.
3. Chances are you'll be making a lot of them, so keep it simple! Trust me, you'll be pulling your hair out if you try to put too much detail in each individual bar. Swirling is the easiest and fastest way to add interest.


If you are really crafty, you can take your wedding favors to the next level by customizing them with the couple's initials. Soap Queen has made it easy in this great video:


Soap Queen TV Episode 10: Wedding Favors from Soap Queen on Vimeo.